Welcome to a behind-the-scenes look at our latest creative project—a 2D animation designed to promote environmental sustainability. This initiative was developed with a focus on raising awareness through engaging digital storytelling, specifically aimed at stakeholders who care about our planet’s future.
In this blog, we’ll walk you through the entire journey, from the initial concept and design process to the animation’s development and the feedback it received after launch. You’ll get insight into the techniques used, the challenges we faced, and how we ensured the message stayed clear and impactful throughout.
Whether you’re an animation enthusiast, an environmental advocate, or just curious about how digital content can drive change—this project offers a great example of how creative media can support sustainability in a compelling way.
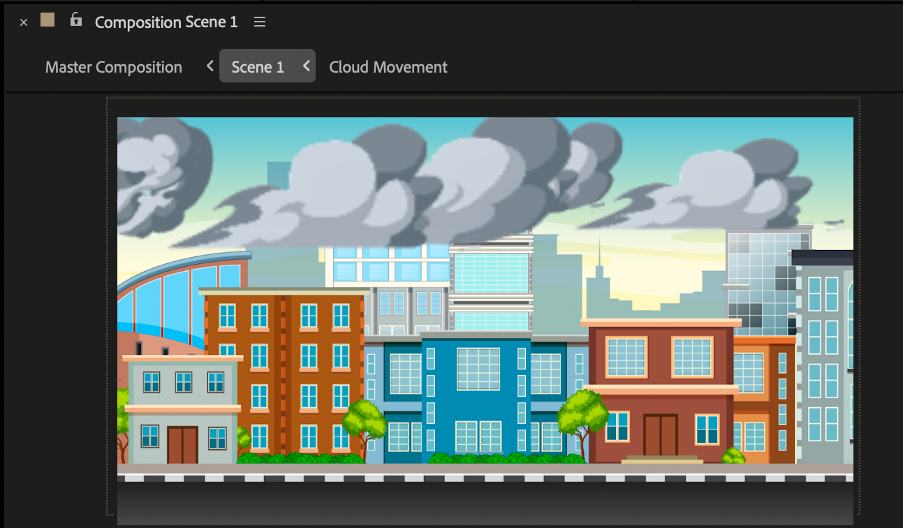
The animation kicks off with Scene 1, where the foundation of the visual story is laid. A city background image was imported and carefully placed into the composition using Adobe After Effects.
To ensure the background fit seamlessly within the animation template, adjustments were made to the image’s scale, positioning, and alignment. This step helped create a cohesive look that matched the overall tone of the animation, while setting the urban environment where the sustainability message begins to unfold.
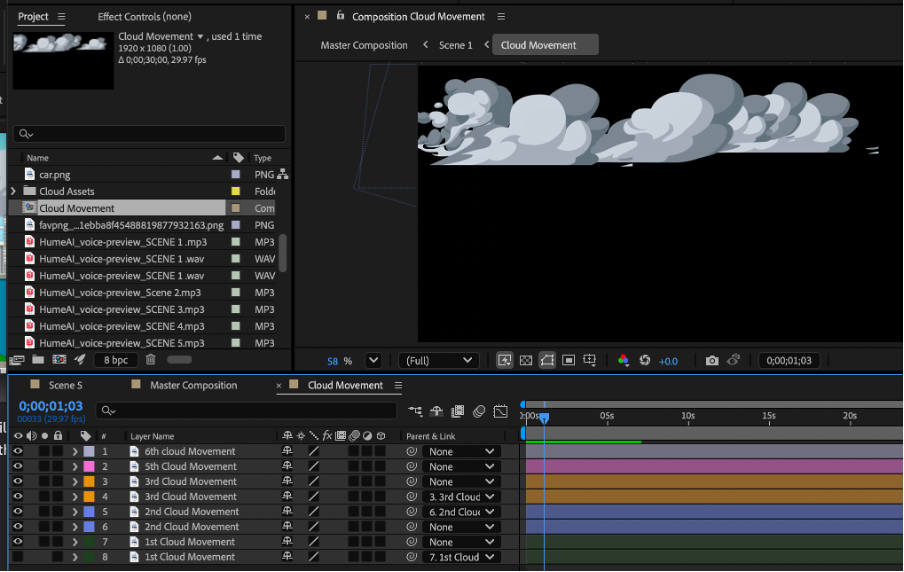
To bring depth and realism to the animation, a separate composition was built just for the cloud movements. Each cloud PNG was parented to another using Adobe After Effects’ Parent & Link feature, allowing multiple cloud elements to move together as a single unit. This setup ensured consistent motion in terms of position, while rotation and scale remained static for this scene.
Only the position values were animated, keyframed to move left or right across the screen—simulating natural wind-driven cloud movement. The choice of dark, gloomy clouds helped emphasize the bleak, polluted atmosphere of the city, aligning perfectly with Scene 1’s message about environmental degradation.
Once this cloud animation was complete, it was imported back into the Scene 1 composition, layered above the background image to give the illusion of moving weather over the static cityscape. Creating this animation in a separate composition allowed for better structure and reusability later in the project, ensuring that elements stayed organized and could be repurposed in future scenes if needed.
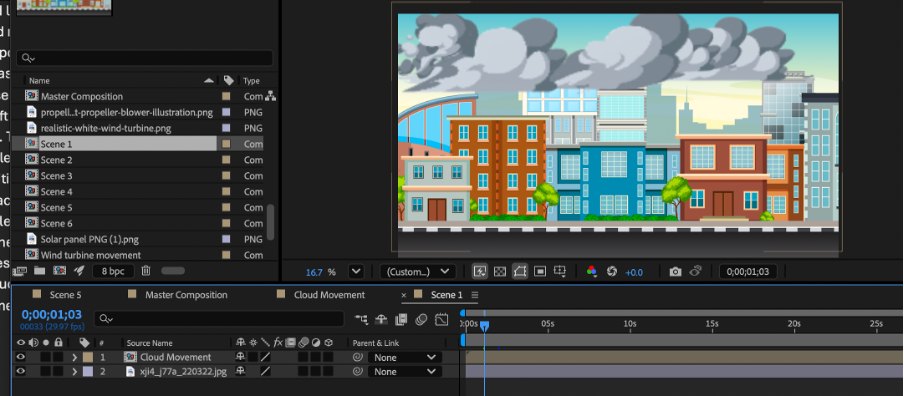
The image above provides a full view of all the assets and components used to build Scene 1 of the animation. It captures what the timeline and composition look like at the starting point of the animation sequence, offering a glimpse into how everything comes together visually in Adobe After Effects. From layered backgrounds to cloud elements and timing keyframes, this setup forms the foundation for the environmental storytelling in the opening scene.
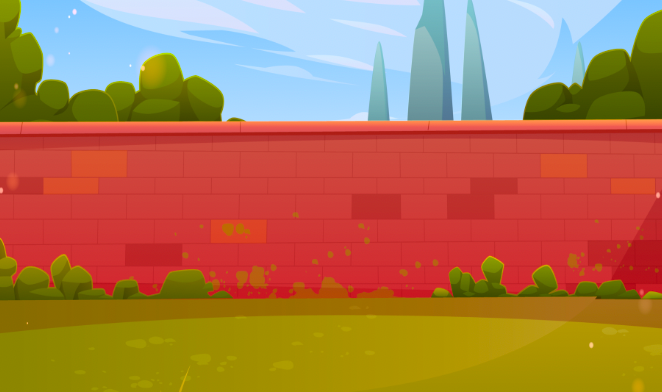
To kick off the second scene of the animation, the background was the first element added. A clean brick wall was chosen to keep the visual space simple and focused. This minimal backdrop ensures that all other components—like characters or text—stand out clearly in front of it. The goal here was to avoid visual clutter and maintain the viewer’s attention on the main action happening in the center of the frame.

With the background in place, the next step in scene two was assembling the animated character—one part at a time. The legs were added first to anchor the figure to the scene, followed by the arms and forearms to begin shaping natural, believable movement. The head was positioned before the torso to ensure a seamless connection between the neck and upper body. This layered approach helped create a more lifelike and cohesive animation, setting the tone for the rest of the scene.

The arm was the first body part animated in the second scene, focusing specifically on the forearm and upper arm movements. To keep the motion natural, the right hand was linked to the forearm using the parent feature—so the hand would follow the forearm’s movement without detaching or moving independently. The animation process began by carefully rotating the forearm to determine the realistic range of motion. Once the keyframes for the forearm rotation were set, attention shifted to the shoulder and upper arm. These were rotated and keyframed with precision to mimic real human movement, ensuring the arm’s animation flowed smoothly without distorting the character. Throughout, the animation was played back repeatedly to fine-tune the rotations, making the arm’s motion as natural and believable as possible.

To bring more life and detail to the second scene, a plane was animated soaring across the sky. Using basic animation techniques, keyframes were set to control the plane’s position over time. The plane gradually moves upward and off-screen, creating the effect that it’s climbing higher and higher into the distance until it disappears from view. This simple yet effective animation adds a dynamic touch to the scene, enhancing the overall storytelling and visual interest.
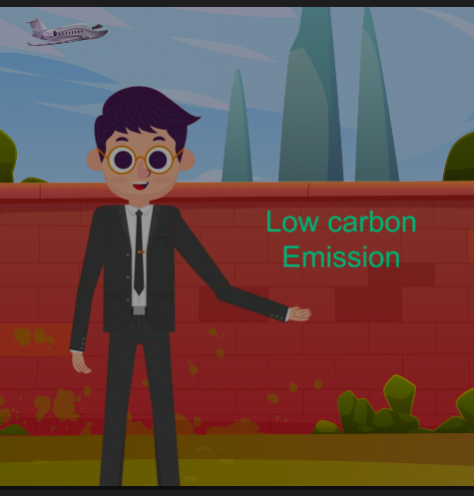
The final element of the second scene features green text that appears right as the animated character begins to raise their arm toward it. This effect was achieved by carefully keyframing the text’s opacity throughout the animation, making it gradually fade in just as the arm comes into view. The timing creates a smooth, natural interaction between the character and the message, drawing the viewer’s attention exactly when it matters most.
The third scene takes a straightforward approach, focusing on clarity rather than complex animation techniques. It started with adding the background, carefully adjusting it to avoid any stretching or distortion during the animation. Next, PNG images of solar panels were scaled down and placed onto the rooftops to give a realistic look of fixed solar panels on buildings.
One challenge that came up was the solar panels moving unintentionally as the camera shifted with the overhead viewpoint. This issue needed attention to maintain the realism of the scene, ensuring the panels stayed properly positioned throughout the animation.
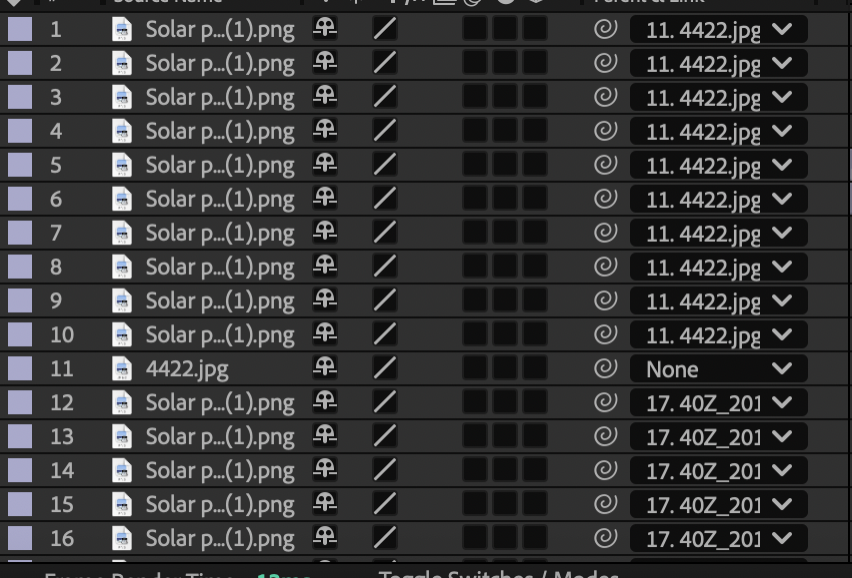
To fix the issue of the solar panels moving with the camera, each panel was linked directly to the main building image. This meant that as the camera shifted or the point of view changed, the solar panels stayed firmly in place on the rooftops. This simple but effective technique helped keep the scene looking natural and consistent throughout the animation.

The background image for this scene carried the same core idea as the third scene, reinforcing the overall message. To enhance the visual flow, the opacity of this background was gradually adjusted to create a smooth fading effect. This subtle transition made the animation look polished and professional. Additionally, all images used in the first part of the scene were timed carefully to only appear for a set duration, ensuring they wouldn’t overlap or distract during the second part. This attention to timing helped maintain a clean and seamless animation experience.
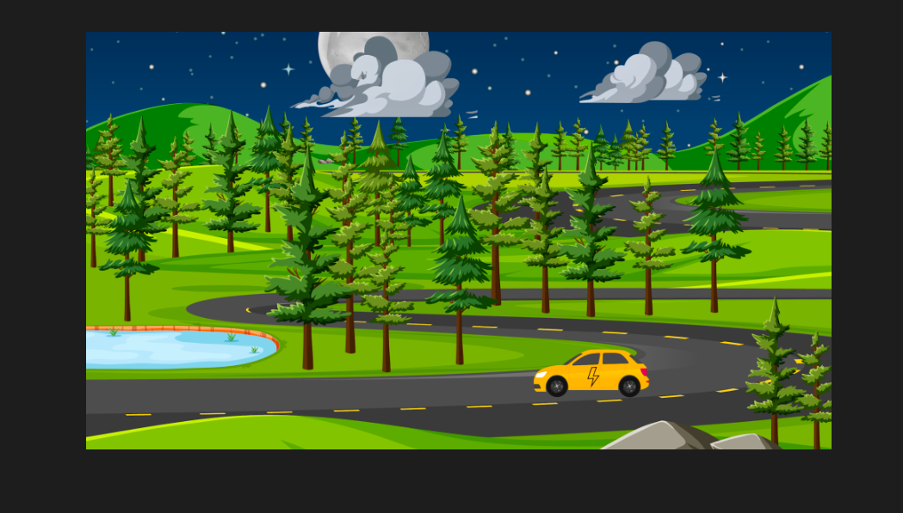
When starting work on the fourth scene, the background was the first element added to set the stage. After that, a separate composition was created specifically for the car’s movement. This approach allowed the car animation to be handled independently, making it easier to control and adjust without affecting the rest of the scene.

To bring the car’s driving to life, the process began by adding the car’s body into the composition. Once the body was in place, the wheels were added and carefully adjusted to match the car’s height and overall look. This step ensured everything lined up perfectly for a smooth, realistic animation.

Instead of rotating the wheels manually, they were set to complete a specific number of rotations within a set time—20 rotations, to be exact. This rotation was keyframed right from the start, so the wheels begin spinning as soon as the fourth scene kicks off.
An electric symbol was added to the car to clearly convey that it’s an electric vehicle. This icon was linked to the car itself, ensuring it moves seamlessly along with it.
Once the car animation was ready, it was combined with the background image and scaled down to fit perfectly on the road where the car would be driving.

To wrap up the fourth scene, the clouds were added using the same techniques from the first scene. Clouds were grouped and moved across the screen to simulate wind, adding a natural, dynamic feel to the animation. This time, the clouds were scaled larger to create the illusion that they’re closer to the hills in the background, enhancing the sense of depth and realism.
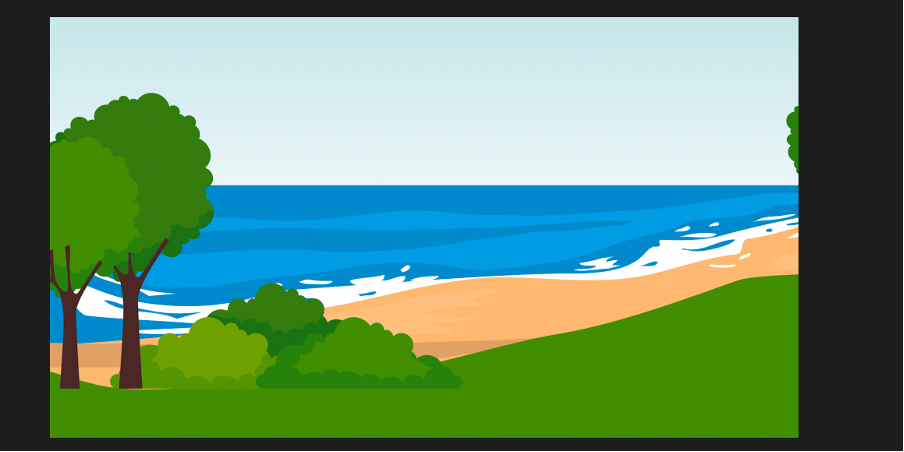
Starting off the fifth scene, the background image was carefully set and adjusted to make sure it looked natural and wasn’t warped or distorted. Getting this right was essential to maintain a clean and professional look throughout the animation.
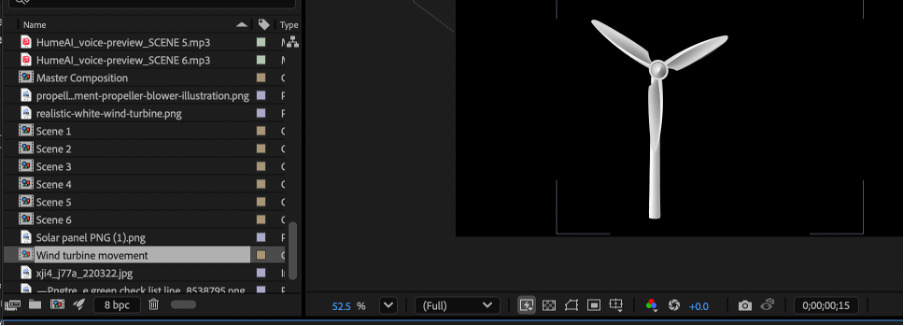
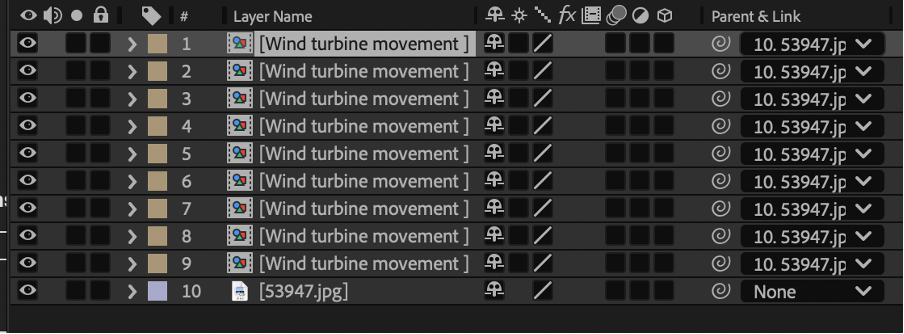
Next, a separate composition was created specifically for the wind turbine, which is the main focus of this scene. The foundation of the turbine was carefully placed and scaled to fit perfectly with the background. Then, the propeller was added, positioned right at the top of the foundation.
However, an issue came up during the animation process—the propeller wouldn’t rotate correctly. Instead, it spun around its original anchor point, which caused an unnatural movement. To fix this, the anchor point was adjusted to the exact center where all the blades meet, mimicking how a real wind turbine operates.
With the anchor fixed, keyframe rotations were set, allowing the propeller to complete 13 full rotations by the end of the sequence. Additionally, the propeller was linked to the foundation so they moved together seamlessly, ensuring the animation looked smooth and realistic.
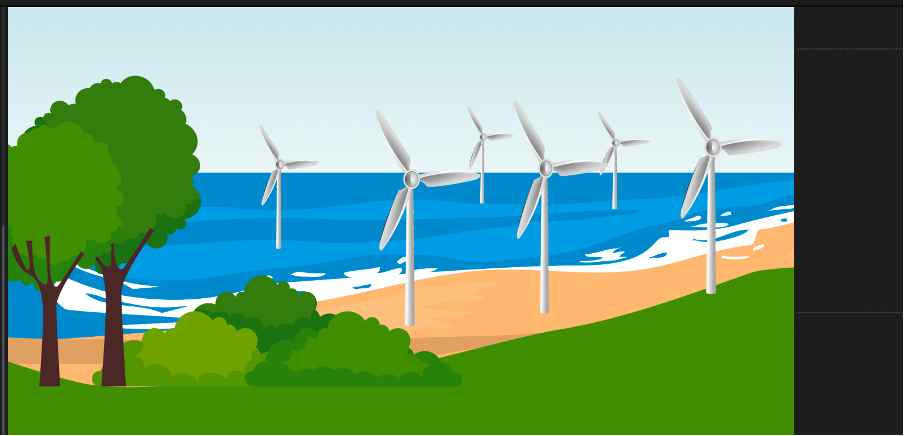
After finishing the wind turbine animation, the next step was to bring it into the main scene. The turbines were scattered thoughtfully across the image, with some placed in the background to create the illusion that they were far out at sea. Others were positioned closer to the foreground to provide a sense of depth and contrast between near and far. This layering helped make the scene feel more dynamic and realistic, as you can see in the image above.
Since the 5th scene required the entire image to slowly move to the left to reveal more wind turbines, all the turbines were linked to the background image. This ensured they stayed perfectly aligned and didn’t overlap or get out of place as the scene shifted. The smooth leftward movement was achieved using simple keyframing, creating a seamless flow that guides the viewer’s eye across the scene.

The 6th animation kept things simple but effective. It started with an image placed into the composition, which was keyframed to slowly move to the left. As the image gradually centered on the screen, a text message appeared, encouraging viewers to be “A low carbon leader.” The text was brought to life using keyframed opacity, smoothly fading in to full visibility right as the image reached the center—making the message clear and impactful.

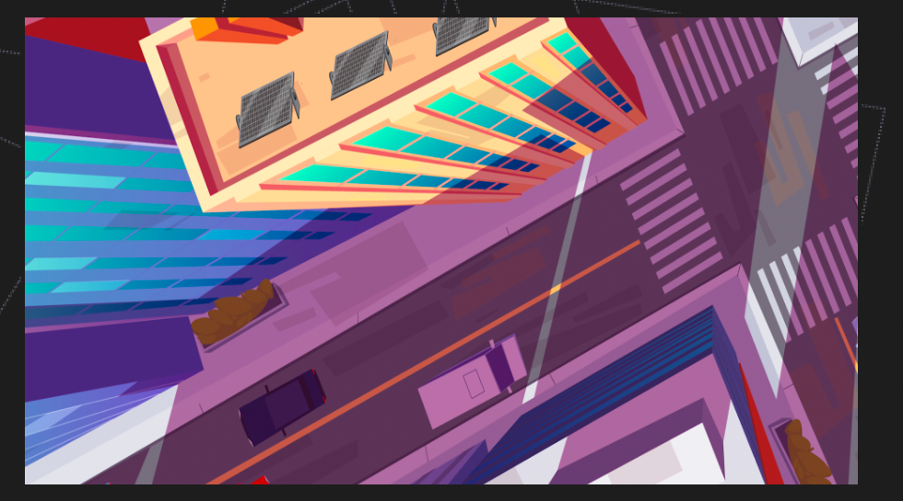
After importing and assembling all the scenes into the master composition, the next step was to create smooth transitions between them. To make the flow seamless, a fade effect was applied across all scenes. For instance, as shown in the image above, Scene 1 gracefully fades to black just as Scene 2 begins. This fade-in and fade-out technique was also used at the end of the animation, ensuring the visuals don’t abruptly stop but instead gently disappear, giving the whole piece a polished and professional finish.